
Hello friends at Marieú Technology Corporation, are you worried about who has access to what on your website? With our guide, you can take total control of your WordPress by implementing custom WordPress roles in User Role Editor. This method is key for security and efficient management, allowing you to define exactly what each collaborator can or cannot do.
We will show you step-by-step how to set up these permission layers with the User Role Editor plugin. Follow these 4 simple steps and ensure your site is secure and organized against internal errors or unwanted access!
How to Create Custom User Roles in WordPress with Marieú?
To create these custom WordPress roles in User Role Editor, we will start with a practical case. We will briefly explain why the need to use this plugin with its custom user role creation feature. Number two, we will install the plugin. We can install this plugin within WordPress. Remember that these features we will explain are completely free. Number four. Finally, we will perform some tests to see how this new role we are going to create with limited access acts.

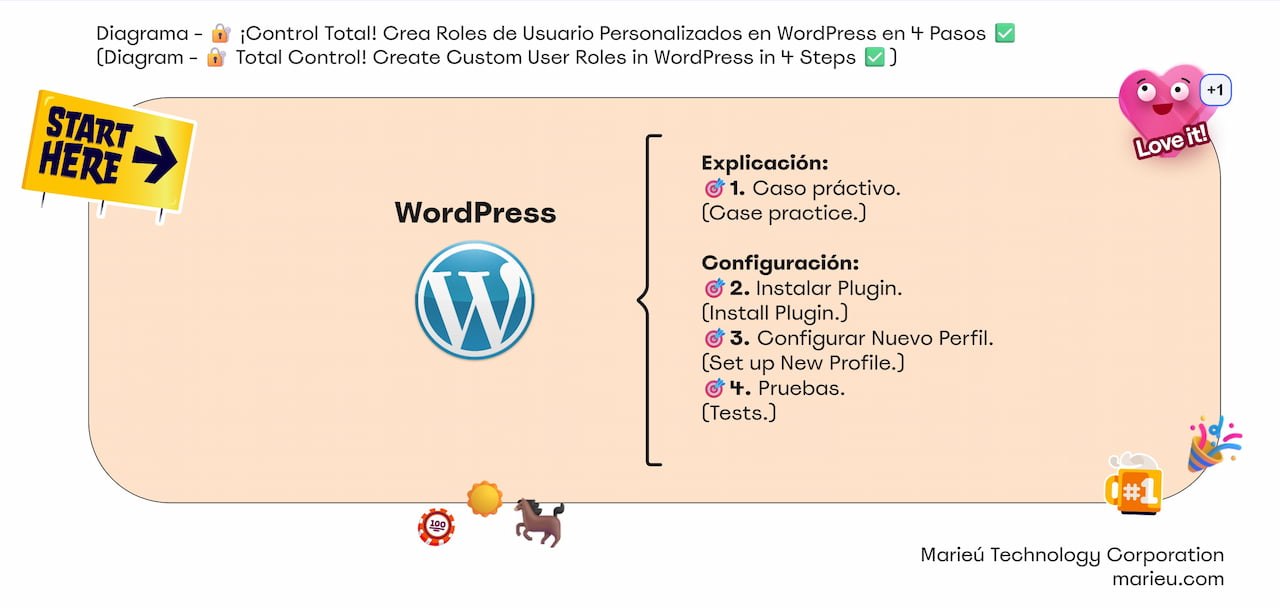
Diagram: Create Custom WordPress User Roles in 4 Steps!
Source: Author’s Own Work, via Miro.
So, here we have a practical case. Initially, when we have our website and want to share access with the shop manager, we can add a new user and assign a profile. Remember that WordPress already comes with some default profiles. We have an Administrator profile, a Shop Manager profile, a third one which is Subscriber, and so on. Each of these profiles has limited access.
In some cases, for example, if we talk about the shop manager, the functions of this role are not completely limited. For example, if we look at the shop manager profile, they have the ability to access Woocommerce—there it is! Internally, they can manage products, change the title, change the description, delete a product, change the price, among other actions.
If we, for example, want this shop manager to not delete products, nor change descriptions, titles, or modify anything regarding products, we will show you how to limit access with custom WordPress roles in User Role Editor.
The plugin we are going to install is called User Role Editor. The developer is Vladimir. Always remember to search by name and then by developer, as there may be duplicates, and we want to install the official plugin. It has good reviews, 243 positive five-star reviews, and we have tested it. Currently, its configuration is super simple, and we will see it next.
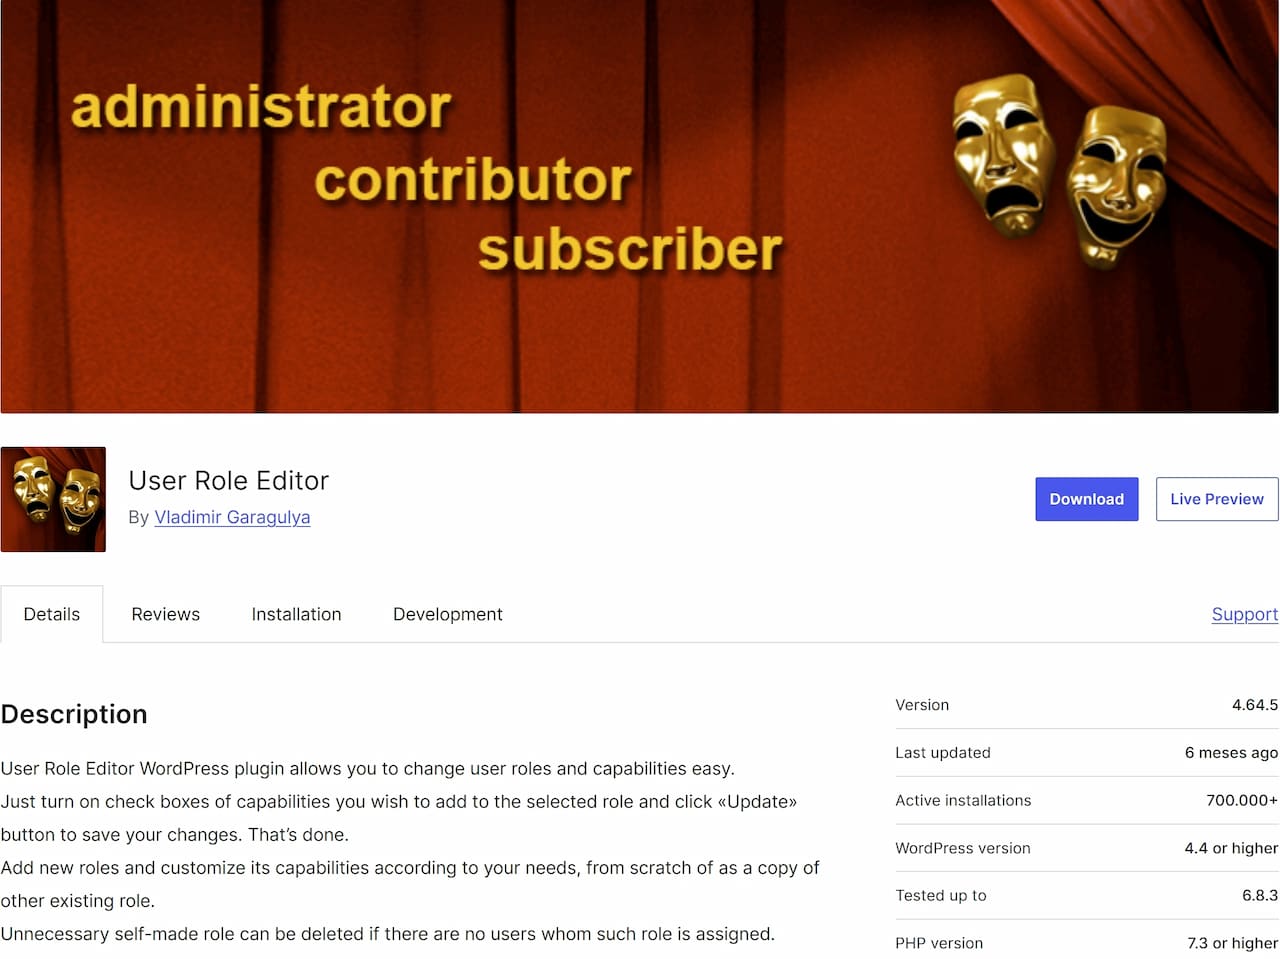 Where to download the User Role Editor plugin in WordPress?
Source: Author’s Own Work, via WordPress.
Here we are inside the virtual store of Ricuritas de Marieú. Remember that it is also a brand of Marieú Corp. We are going to go to the plugins section, for that we go to the left section and click Plugins. Inside there, we are going to add a new plugin. Remember the plugin is called User Role Editor. So we press Enter. Then here we install the plugin, click Install Now, once installed, click Activate.
So, we already have the plugin active. To find it, we press control + F and type User Role Editor. Press Enter and it directs us directly to the plugin. Click Settings and here we land on the plugin configuration. Inside Settings, User Role Editor. We are not going to touch all the configuration that comes within User Role Editor. To avoid making it more complex, we will not touch that entire configuration. We will leave it by default, including General, Additional Modules, Default Roles, Tools, and About. We will leave everything there by default.
Where we will edit is within Users, and in Users, we enter User Role Editor. This is where we will finally be able to create a new custom role. For that, we are going to click Add Role. Within this section, the ID corresponds to the identifier of this role.
For example, we can put shop_manager_two. Because remember that there is already a default shop manager. So, in this case, we are going to put shop_manager_two. In Display Role Name, we put the name, in this case Shop Manager Two, without underscores but only with spaces. And finally, we can copy from an already created role.
That is, if we create this Shop Manager Two role, it will be created with the same permissions, for example, as the default shop manager. If we do not want it to have the same permissions, we simply put None and click Add Role. When we are just starting with this configuration, we recommend copying from the Shop Manager role. Why? Because it is already extracting all the fields of a shop manager role, and we can remove some additional permissions. So, click Add Role.
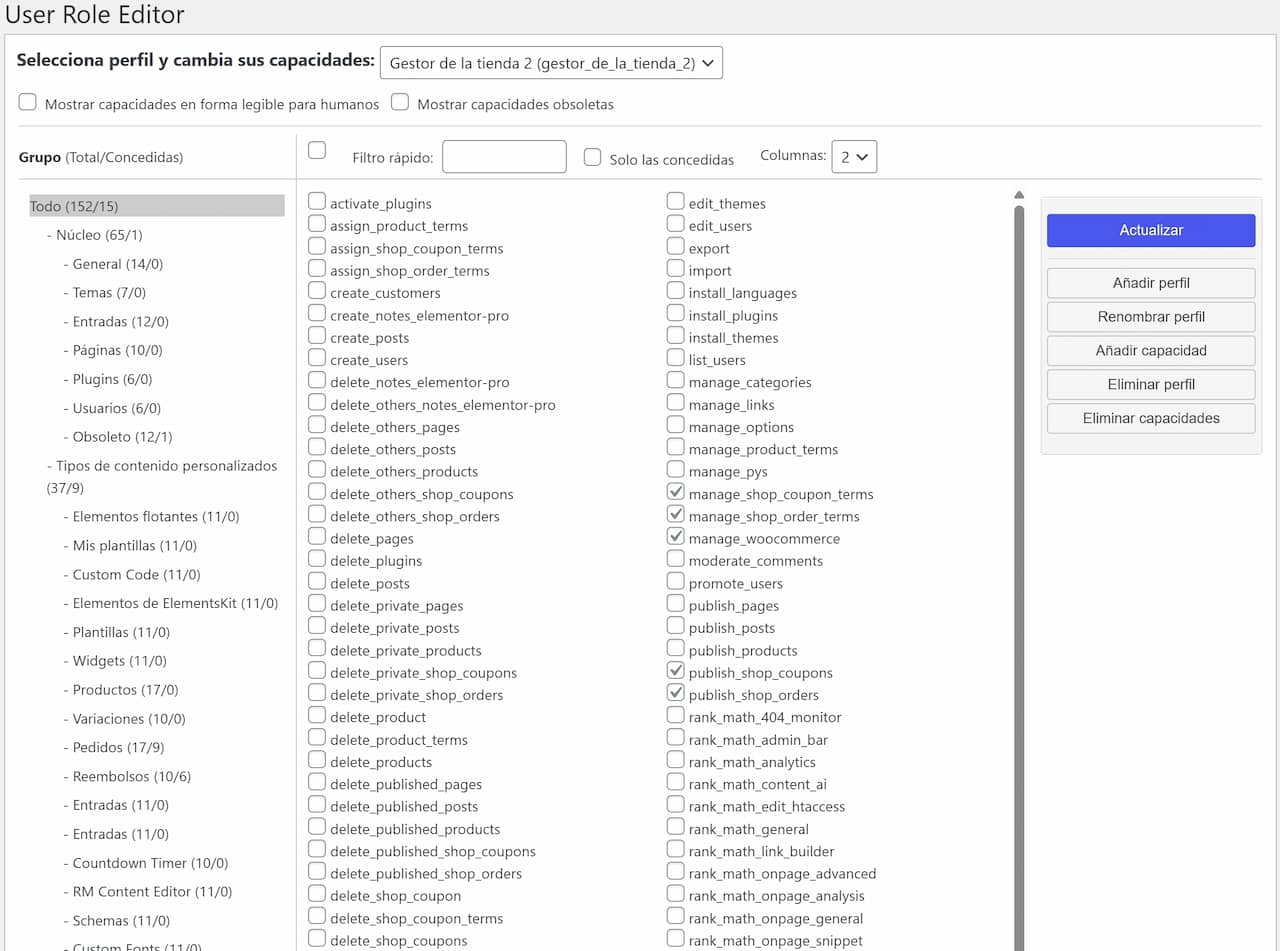
Creating Custom WordPress Roles in User Role Editor.
Source: Author’s Own Work, via WordPress.
So, here we already have Shop Manager Two created. Author, Contributor, Customer, Editor, Shop Manager One, and Subscriber are already created by default. The permission we created is extracting all the permissions from Shop Manager One—there it is! On the left panel, we can see it by categories. If we don’t want them to view pages, we select Pages and if we don’t want them to be able to delete any pages, we remove each of the page options. For example, delete published pages, delete private pages, delete pages, among others.
Also, if we, for example, do not want them to enter the Plugins section, we can also leave it by default, which means they will no longer be able to see the plugins section. Down here we also have the Woocommerce part—there it is! We select Woocommerce and here we have all the permissions.
Currently, they will be able to delete products. We can also remove all products collectively. Furthermore, everything that is Delete can be removed so that they do not have access. Remember that this is only a shop manager. If we have another position or area, we can limit access according to their functions—there it is!
So, once you have finished removing all those functions that we do not need them to enter or modify, click Update here, click Yes, and that’s it. The new role is updated.
Now we will move to the final part of the guide, where we will perform the tests. For this, we go to Users, inside Users we click Add New User. And here we are going to test with our corporate email hola@marieu.com—there it is! They already have the credentials. It is as if you were creating a new profile for your collaborator.
This profile that we are going to create will be the new profile we created, Shop Manager Two. So here we simply save, Add New User. Now we are going to enter the Hostinger email. Inside the Hostinger email, here we have the invitation that is sent. The link arrives so that the user can set a new password, or, the second option is to log in using the password we will provide. We select the first option, and here the user can create their new password. We copy it and click Save Password.
With this new password, we can log in here hola@marieu.com. And we place the password here, since we have entered our name and also our password that we have already generated, we click Log In.
Final Results
So, remember we are already inside our profile here. What we are going to validate now is the products. If we enter the Products section on the left, we see how the user can no longer delete products.
If we want to make it much stricter, only allowing them to see the Woocommerce part and Products, we can also limit that. We go to the General part and we are also going to avoid removing most of the configurations such as export, import, manage categories, manage links, among others.
We are going to see how little by little we are going to reduce the functions they would have within WordPress. We are gradually limiting them. What they would have the option to do is edit a product, maybe a discount coupon, and so on. Also the refunds part, but not the post sections.
When we have finished, if we update, we click Yes. And here, what we are going to do is refresh, and we are going to realize that we no longer have access to certain functions. See how it is being reduced? We only have some functions for Woocommerce, Products, Payments, Marketing, Analytics, among others. And so, little by little, we are going to reduce the functions. Done, thanks friends at Marieú Technology Corporation!

THE AUTHOR
Daniel Alejandro Montoya Godenzi
Alejandro, holding a Master’s degree in Administration and Project Management and a Mechatronics Engineer, has experience in digital technology projects. He is part of the Marieú Technology Corporation team. In his free time, he enjoys creating new projects, reading a book, or watching a series.





