
Hello friends at Marieú Technology Corporation, if you want to connect domain to Shopify professionally and ensure the success of your store, this guide is essential for you! Having your own domain increases your brand’s credibility and professionalism, eliminating those annoying Shopify subdomains.
We will show you step-by-step how to perform the DNS configuration so that your online store is operational and looks 100% professional. Avoid common errors and make the transition perfect so your e-commerce starts “From 0 to Success!”
How to Connect Domain to Shopify with Professional DNS Configuration?
Here we have a small diagram. We will start with the provider selection. Currently, we have several providers in the market, both local and international, each of which can offer an external domain with different extensions. For example, your business name .net, your business name .es, your business name .com, and so on.
So, having selected our provider, we can buy this domain and create our website. For this, we have to analyze a CMS on the market. For example, currently we have several, one of them is Shopify, we have WordPress, Wix, among others. In this case, we will focus on Shopify.
We are going to analyze it, we are also going to see what their plans include, to later go and change the registration with our external domain provider and point it to Shopify’s records. Finally, we will have the results to validate that everything is working correctly.

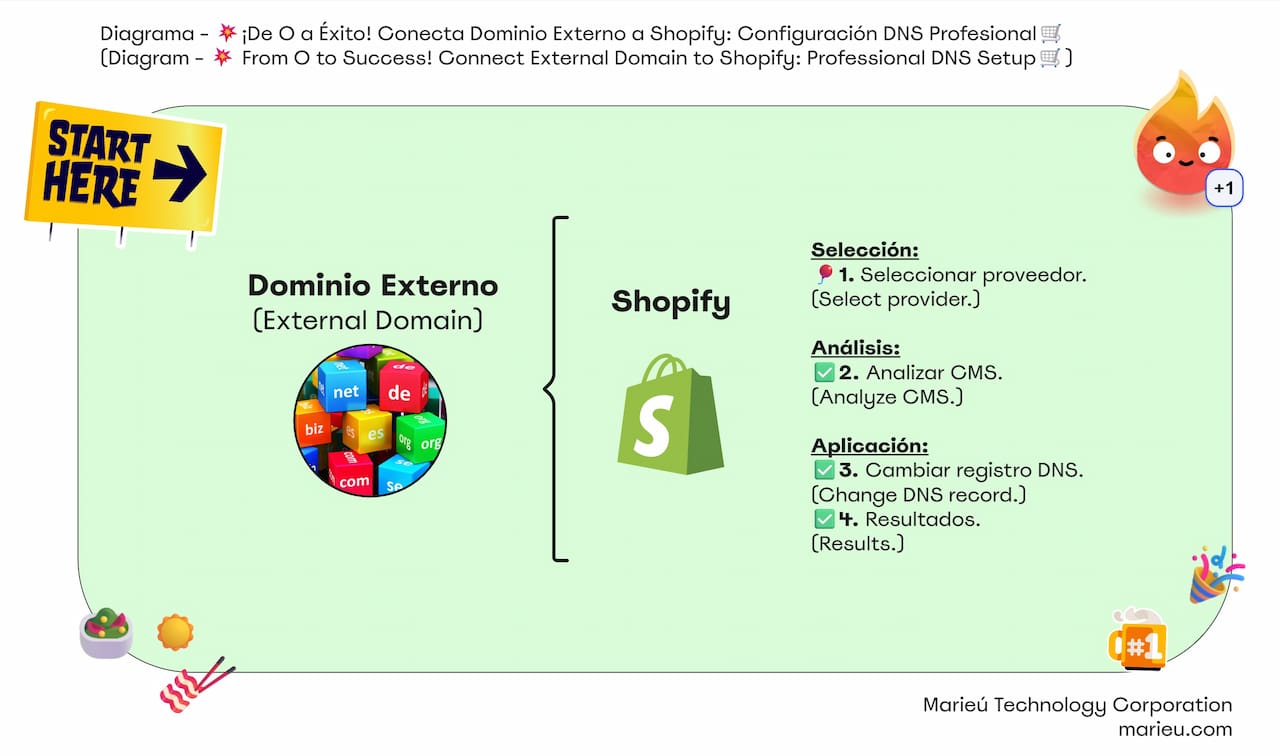
Diagram: Connect Domain to Shopify and Configure DNS with Marieú Corp!
Source: Author’s Own Work, via Miro.
For example, let’s go into Google and type “buy domain Peru.” We always recommend that if we want to buy a domain, we do it within local providers. That is in case we want to opt for a .PE domain for Peru, maybe .MX for Mexico, .CA for Canada, among others. So, if we, for example, want a super generic domain, .net, .com, it is recommended to use a generic provider. It can be within the Shopify CMS, within WordPress, among others.
Here, for example, we have several, several providers. This is at the local Peru level, and here we have landed inside AQP Host, aqphost.com, which also offers domain services locally in Peru. For example, we have our marieubelleza.pe domain, which also forms a brand of Marieú Corp.
Okay, so, we have already selected our provider. Now what we are going to do is analyze the CMS. For example, here we have the Shopify plans. Remember that for this connection, we must have already purchased one of the Shopify plans. We will also leave the direct link in the description. And remember that any of the plans already come with the domain option. We will press control + F, domain, there it is!
One of the benefits is that when you purchase any plan, it offers you the use of your existing domain, which is what we are going to do now. It also offers your business name .myshopify.com. This is a domain that already comes with the plan, but the idea is to have our own domain without the .myshopify.com extension.
We are inside the Shopify admin, we are going to go to Settings and here we go to the left section to go to Domains. Inside Domains, remember that it already comes with this free domain, but the idea is that we can connect our own domain so that it does not have the .myshopify.com extension. We go back and here we can connect our existing domain.
For this, we are going to click Connect existing domain, and internally it will give you the option so we can add the DNS records and point them to Shopify.
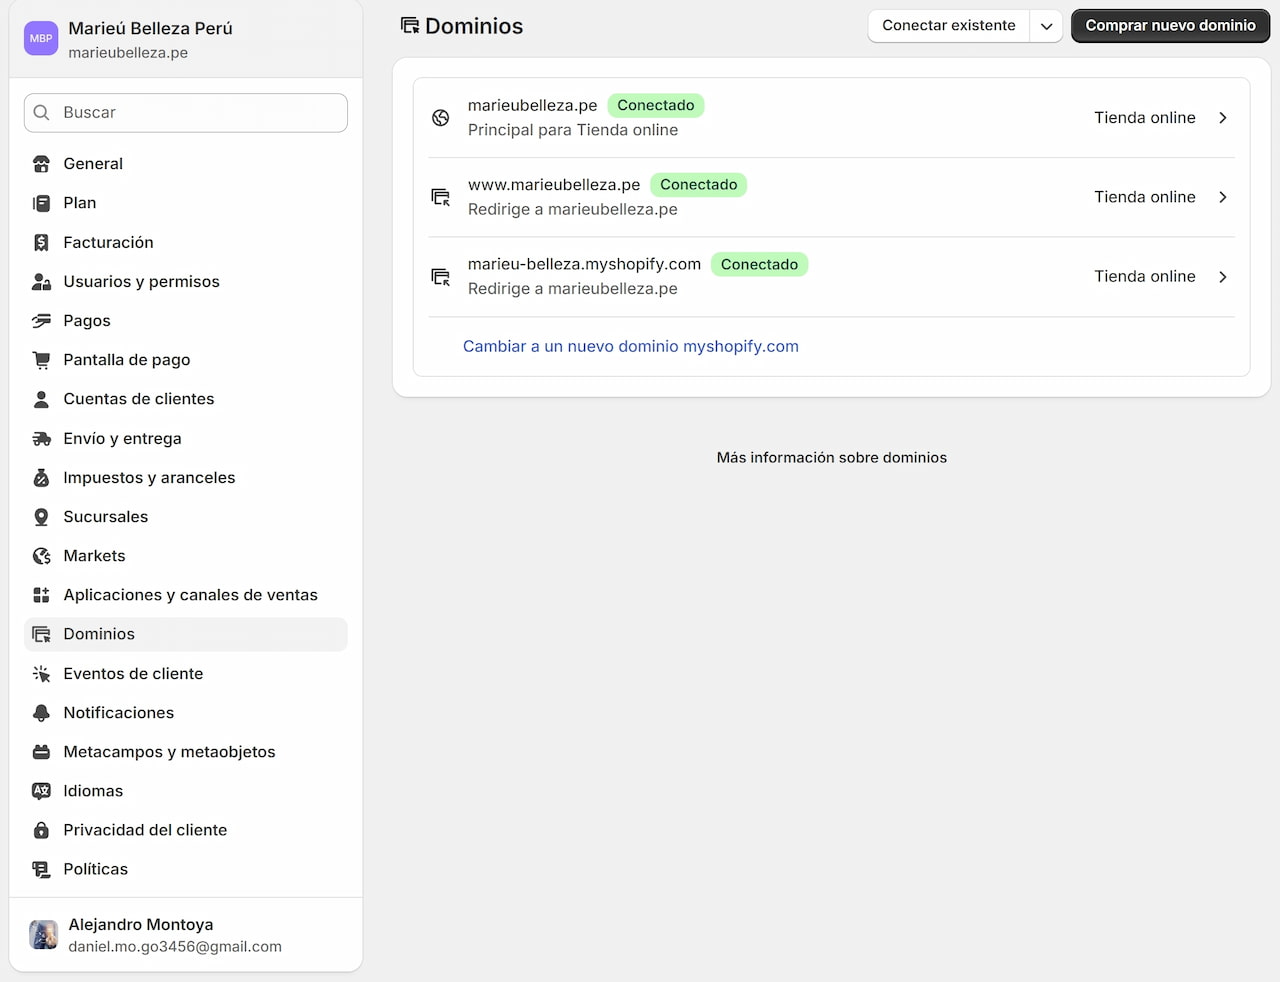 How to Connect Domain to Shopify without Errors?
Source: Author’s Own Work, via Shopify.
Before that, we wanted to show you how much this domain costs. If we do not have an existing one and want to buy a new one, we can also do it through Shopify. This, keep in mind, for example, the same domain with the local extension is being offered at 65 USD per year. So, we see how the difference is high.
The recommendation here is that if we want to buy a local domain, with a local extension, for example, mybusiness.pe, mybusiness.cl or mybusiness.co, among others, we have to buy from a local provider. Remember that we at Marieú Corp also offer website services. You can go to prices and we have the first website service. In fact, we also include the .com domain. You can also have another extension, it is already included in the plan.
We always recommend a more economical price to our clients. If they opt for a local domain, we always recommend a local provider. Why? So that finally when they renew, it is very convenient for each of them. We offer a Basic plan, we have a Medium plan, and a Premium plan.
If you want to build your e-commerce from scratch, we offer you the service within the Marieú Corp Premium Plan. If we want a purely informational page, we offer it within the Medium plan, and a landing page, just a single page, we offer it within the Basic plan.
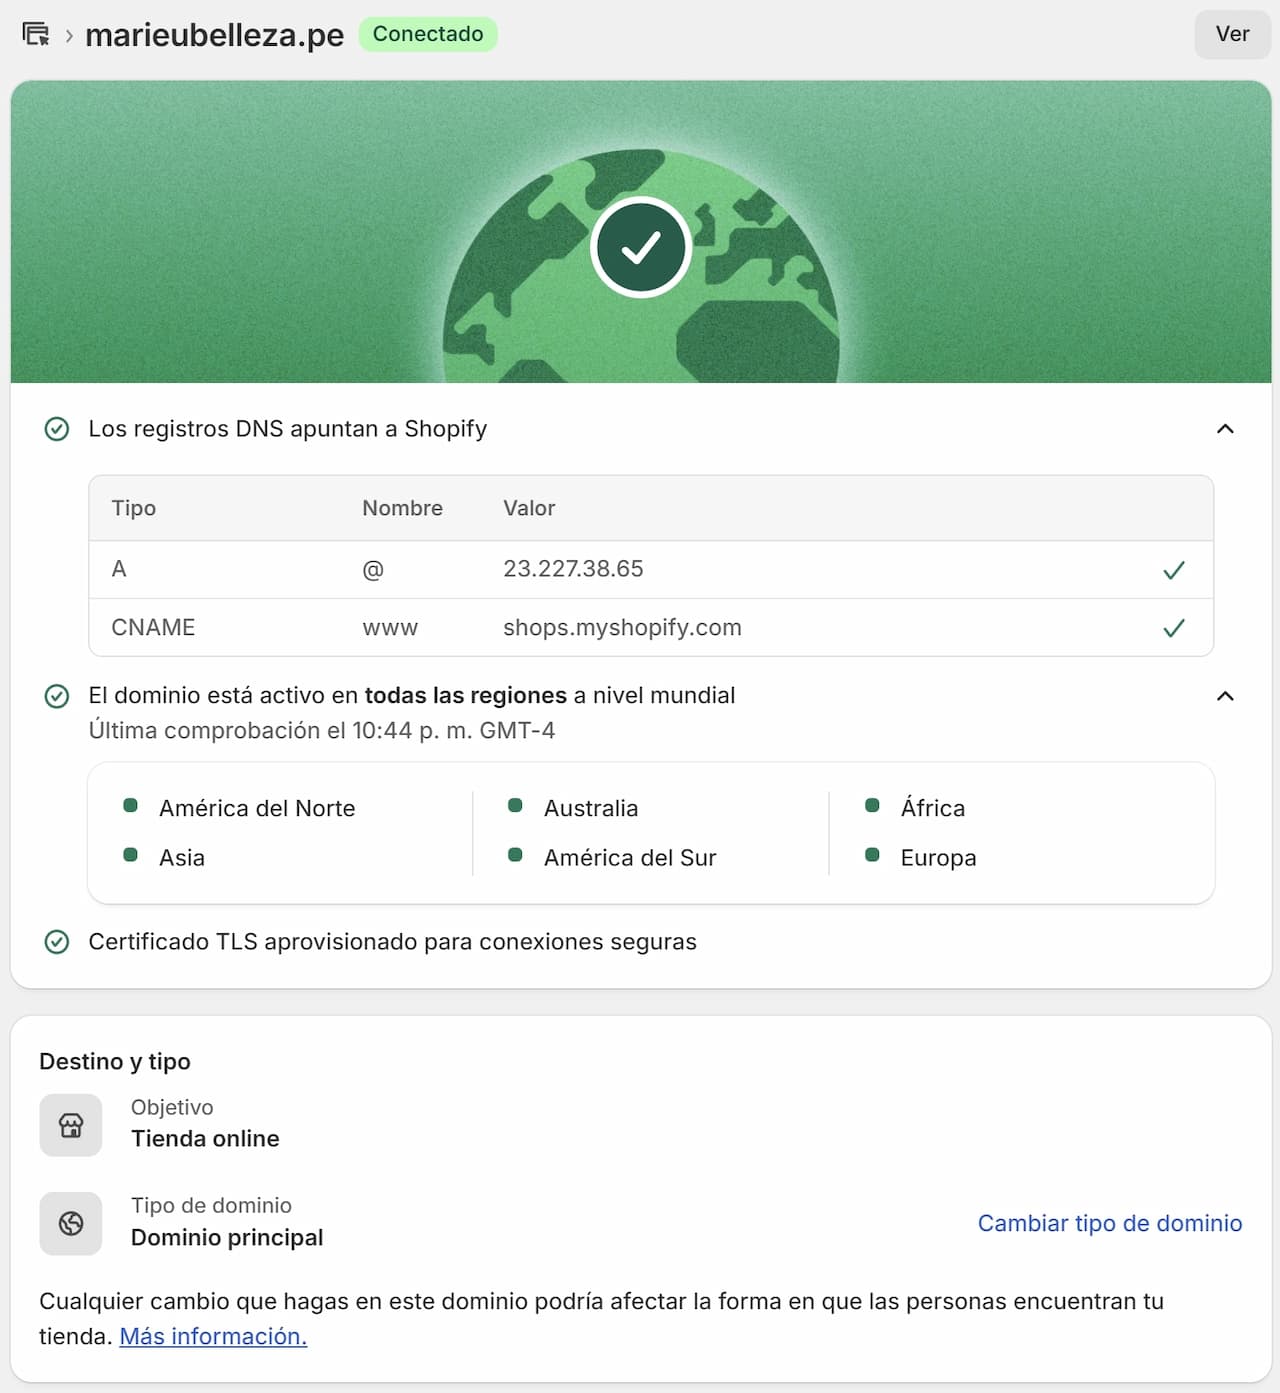
How and Where to Configure DNS Records to Connect Domain to Shopify?
Source: Author’s Own Work, via Shopify.
So, now we are going to go directly to changing the DNS record. So, here we have our provider. You can have any provider. Remember that there are many providers in the market that offer domain services. So, what you have to do now is enter the Manage DNS section.
Remember that every provider must have this section, and if you already buy the domain, they should give you this option for free. If you do not find it, you can leave it in the comments so we can guide you and you already have this DNS management active. Remember that as providers, all domain providers should have this DNS management.
In fact, with this DNS management, you can register your emails. Remember that we also have a tutorial to register email domains. If we have Hostinger, if we have Shopify, we can do everything here. For example, we are pointing mail records and at the end, the A records appear.
These A records are very important because they directly associate your domain with an IP address. For example, in this case, Shopify’s IP address is generic. We always just have to copy the value. It is an A record with the name @. Remember that @ is the root domain. We copy it and paste it here, there it is!
The Host Name or the Host name is @ because it is the root of the domain, and then the record would be Type A. Remember that you will have several records apart from the A record. And then the address is the one that appears in Shopify, it is the one that appears here. Additionally, it asks for a CNAME record to be able to redirect www to the main domain. This is essential to connect domain to Shopify properly.
Final Results
For example, www.marieu.com and it will direct it to marieu.com. It is no longer necessary to have the www, because when a user enters this address, it will be redirected to just marieu.com. It also helps a lot with SEO, yes, because everyone lands on only one domain.
Now, how do we register here? Simply the name would be www and the value is shops.myshopify.com. For this, we already have it here, www, and the address would be shops.myshopify.com. Remember it is a CNAME record, there it is! and done, we save changes.
In the case of a local provider, sometimes it takes a while to update. We have noticed that sometimes it takes at least 5 to 8 hours to update. After that, you will be able to see the green checkmark here, which means everything is okay. The DNS records point to Shopify. The domain is active in all regions worldwide.
And finally, after you connect domain to Shopify, the TLS certificate will already be generating secure connections for your domain marieubelleza.pe. Done, thanks friends at Marieú Technology Corporation!

THE AUTHOR
Daniel Alejandro Montoya Godenzi
Alejandro, holding a Master’s degree in Administration and Project Management and a Mechatronics Engineer, has experience in digital technology projects. He is part of the Marieú Technology Corporation team. In his free time, he enjoys creating new projects, reading a book, or watching a series.





