
Hello friends at Marieú Technology Corporation, ready for your online store to explode in sales? If you need a Shopify sliding banner that grabs attention, this guide is for you. A well-designed banner is the key visual tool to highlight promotions, new products, and irresistible offers.
We will show you step-by-step how to use the free BSS Banner & Pop-up app and set up this dynamic element in just 4 steps. Optimize your e-commerce conversion and ensure your visitors can’t ignore your best deals!
How to create a Shopify Sliding Banner in only 4 Steps with Marieú?
We will start with the installation of this app. Remember that in Shopify we call it an App and in WordPress we call it a plugin. To install it, the app’s name is BSS: Banner & Pop-up. This app offers us the option to place banners with different types of designs. One of them, for example, is a Shopify sliding banner. Another is to place a button on the banner. We can also add a countdown timer. So, we would see that within number two, which is the banner type.
Number three, we will customize the banner. The recommendation here is to align it with your website’s colors so it looks pleasant for the customer. Finally, we will test the banner, number four, to see how this app is functioning.
Here, within the Shopify App Store, we can search for the app or directly enter BSS Banner. We find it here. A benefit of this application is that it is developed by Shopify, it has the tag, so it is safe and reliable to install this application. Furthermore, it has a five-star rating from a total of 441 reviews, which is quite good. To install it, initially it will appear here for you to install. Click install and then click open.
When the application opens, you will have it here. We agree that it can be integrated and installed within your Shopify admin, and we will have the following configuration. Remember that we must pin it so it doesn’t disappear. We currently have it pinned, and it will always appear in the apps section, right here!

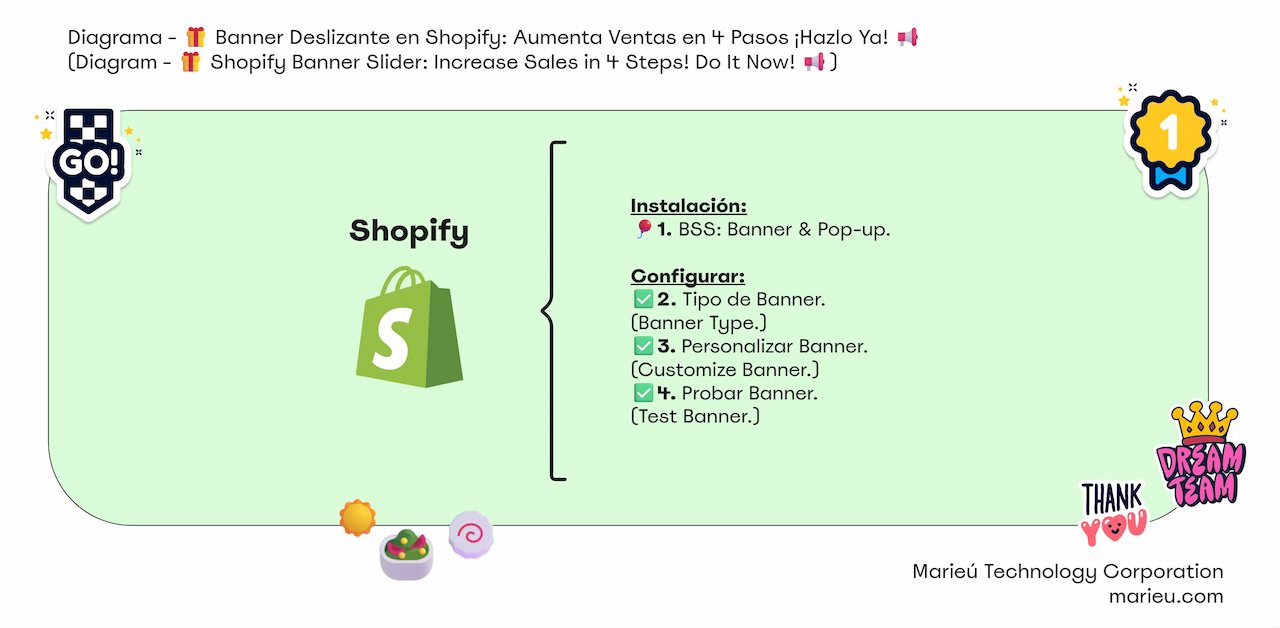
Diagram: Boost Sales in 4 Steps! Shopify Sliding Banner.
Source: Author’s Own Work, via Miro.
Why did we decide on this app? It has good benefits, and the app is completely free. It does not have any plan. There are other apps that require you to pay for a plan, but in this case, it is completely free and it is also from Shopify.
For this guide, we will focus only on the banner part. It has the additional option of being able to include pop-up windows. It also has sales pop-ups, which are small windows that appear in the lower right or left corner so that we can announce a new promotion or maybe some discount and include it.
It also allows for subscriptions, and the integrations are at the end to be able to include maybe an extra language. If our target audience only dominates one language, it is not necessary to include this integration. Let’s go now to the banner part.
In the banner section, to create a banner, we will click Create Banner, and here they offer us a total of five types of banners, which we can select according to our preference and the strategy we are planning for our e-commerce.
For example, the first one is an announcement banner. We can offer discounts on our products in a particular category or collection and we can use this button, which, if selected, directs you to the page or collection that contains those discounted products.
The second one is similar, just that in this case it is a countdown timer, which we can set for 5 days, 10 days so that they can take advantage of a promotion or discount.
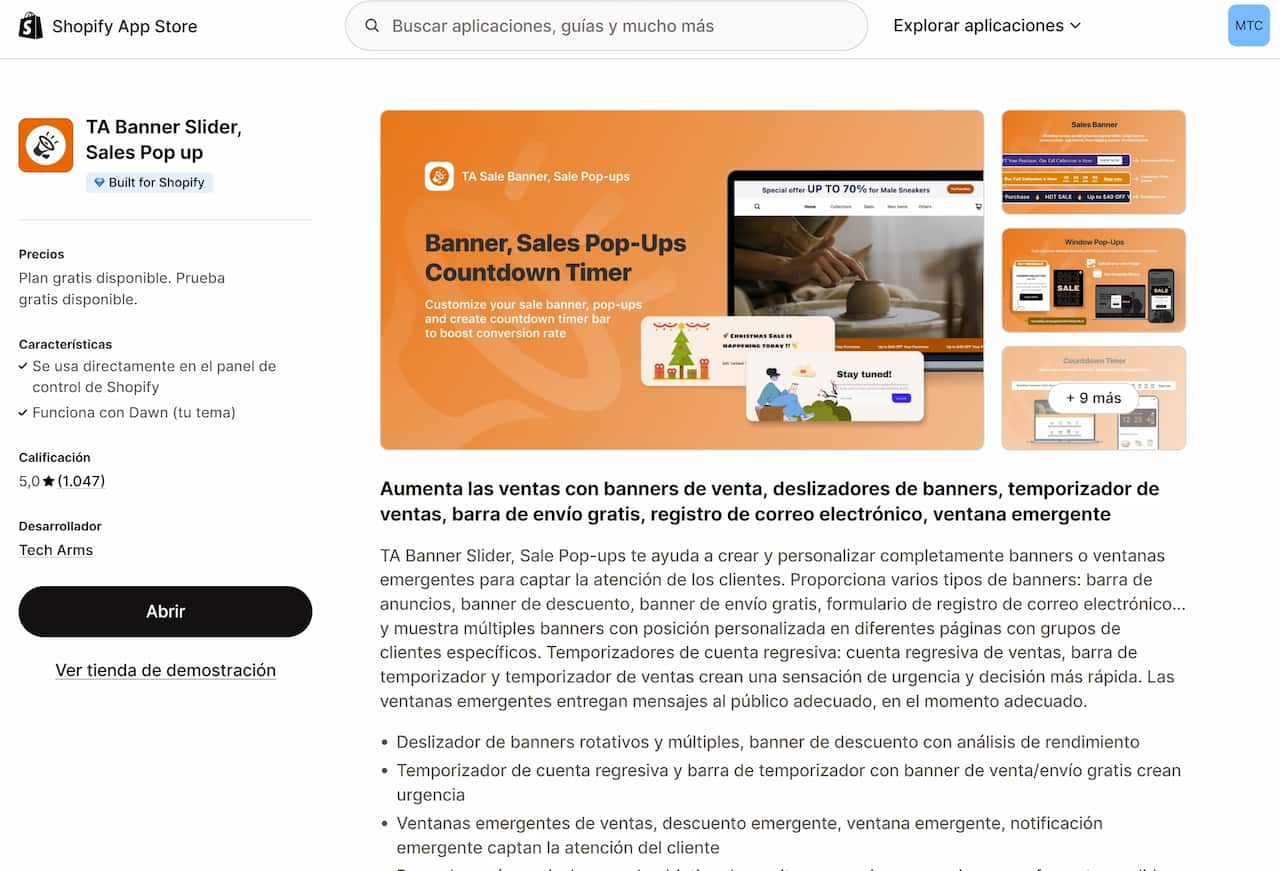 Download BSS Banner & Pop-up App in the Shopify App Store!
Source: Author’s Own Work, via Shopify App Store.
The third one is a banner for subscription. They include their email there, and we can send them newsletters afterward. We also have the option to offer free shipping if they spend 5 USD more, and finally, a discount coupon. There are different types of banners that we can select, depending on our e-commerce strategy, to customize the Shopify sliding banner experience. If we want a preview of what these banners would look like, click See Example here and it directs us to this page.
Here we can already see all the available banners that can be created with this app. We have a Shopify sliding banner, this is what we are going to do now. We have a timer banner with a countdown. We have a simple banner so that we click the buy now button.
For example, here take advantage of a 40% discount on our autumn collection. Select the button here and it directs you to the page with the products that already have a 40% discount applied. So, like that and we have others. For this case, we are going to create a Shopify sliding banner, which corresponds to the first one, which is an announcement banner. We click on the first one, click Select.
So here we will enter the banner customization part. In the left panel we have the first option, which is the banner template. We can select any of the ones we have here or create one from scratch. For example, if we select here, we already see a change. This is a background texture for Easter Sunday. We also have another background for Mother’s Day, for Father’s Day, among others.
This section is for a background texture and in the case of Styles we have a complete background, which is a solid background. For example, we have other designs. In this case, we are going to select Sales Occasions. We are going to select Mother’s Day here. Then we are going to customize it to be a Shopify sliding banner.
For that, we will go to the Banner Element part and the banner type can be single banner, running banner, or rotating banner. The first one is a static banner, a simple banner. The second one contains a Shopify sliding banner, there it is. And for the third one, it would already rotate for each text.
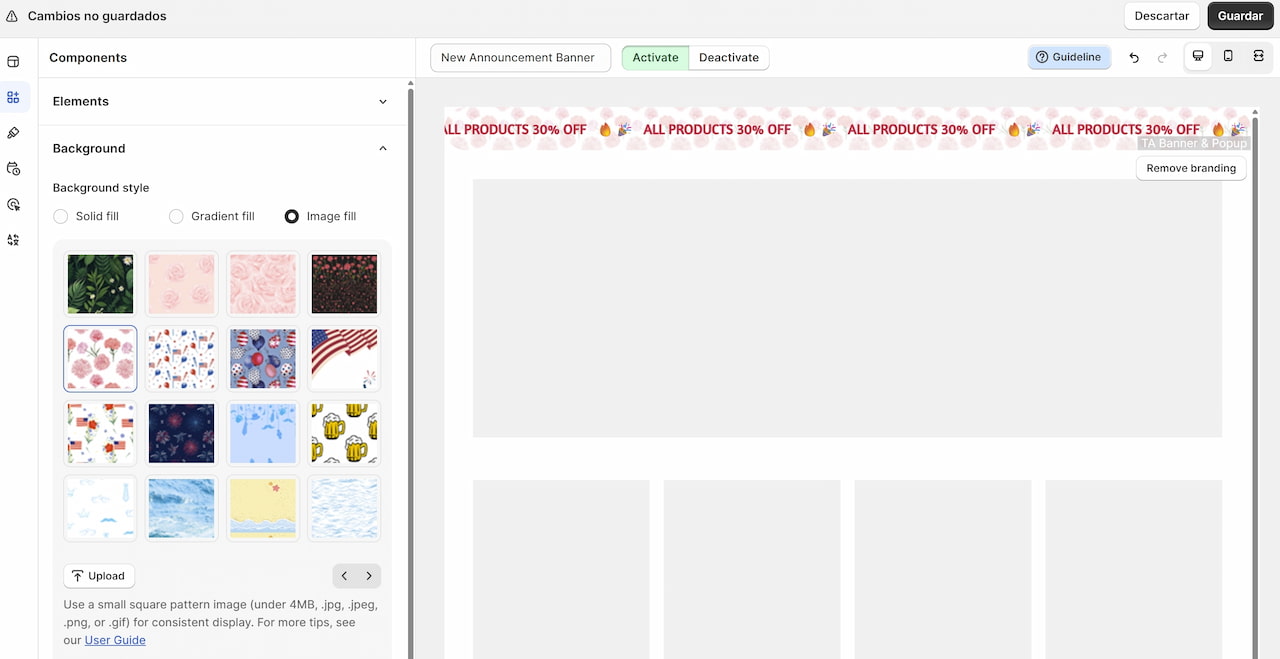
How to Configure the BSS Banner & Pop-up App on Shopify?
Source: Author’s Own Work, via Shopify.
We have a phrase here, we have another phrase here, and so on. We are going to leave it as Running Banner. Also, we can modify the content here with a 60% discount. We can also change it here. If it is only 30%, we can modify it. And there it is! See how it changes. The emoji too. If we have another emoji, we can click here and we can add more emojis.
We can also adjust the font size in the mobile version. Remember that the devices we generally manage are the desktop version and the mobile version. We can change it in the upper right. If it looks too small in the mobile version, in Adjust Font we can change the size. We click and here we can increase the size a little more. You are seeing the changes or we can decrease the size.
We recommend leaving it by default here so that it does not make any changes and stays in its predetermined form, there it is! We can also add a close button, which if we change to a dark color, we will be able to notice here that it has the option to close the banner.
So, in this case, if the user is uncomfortable, they have the option to close that banner and obviously they will no longer be able to take advantage of the promotions. For this reason, we recommend removing that option so that they can take advantage of these promotions we are launching during the season.
Then, we also have the call to action here. This call to action allows us to include a link inside the banner. We move the pointer closer here, we will have the option to click and be directed to the page with the products that contain this discount. For that, we are going to place here to include the option for the banner to be clickable. We put the URL marieu.com here.
We have the option to open it in a new window or, if not, in the same window. We also recommend opening it in the same window.
Next we will go here, to the Style. In style we already have the location part. We can choose to place it at the top, we can choose to place it at the bottom. If we want the banner to also scroll at the same time as we scroll down, that is, we are viewing more products in the body of the website, we have to select Sticky Banner. This makes the banner remain visible when users scroll up or down your website.
Then we have this configuration, in which, we can show on all our devices, show only on the desktop version or show the banner only on the mobile version. For example, if we select, this is the mobile version. If we click at the desktop version level, we can no longer see it. And we are going to leave it in the first option.
For the layout, we can establish the distance between contents. If it is too separated, we can join it, there it is! It looks like the text is much closer. If it is too much, we can adjust it to about 10px. By default it comes with 16 pixels, we can lower it to 10px. This is called Gap.
Then we have the Background. Also, if we don’t like the background much, we can change to another background. We can place a solid background, we can place a gradient, also a background image. This is the texture. Let’s change it, there it is! In fact, if the text is not very clear, we can lower the opacity. If we lower it, the lighter background fades and therefore the texture is not very noticeable. So, we are going to leave it with this texture.
We also have the option to add padding. If we notice that the top of the text has a very large distance, we can reduce it here. Remember that this is in the desktop version. If we increase it to 24px, this will increase more. There it is! And to make it uniform, we have to increase it at the bottom. It is a banner with much more padding.
If we want to do the same in the mobile version, we have the following configuration, there it is! And it would already be changing in the mobile version.
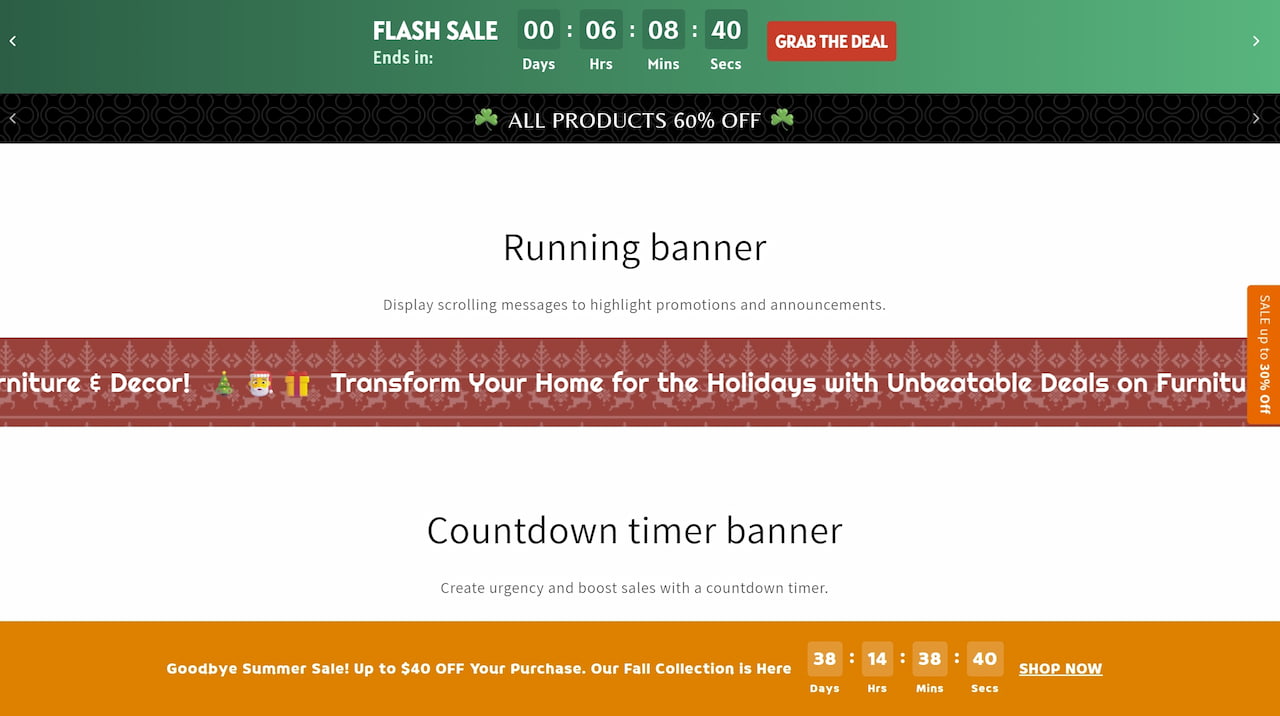
Types of Banners with BSS Banner & Pop-up on Shopify!
Source: Author’s Own Work, via Shopify.
Then we have the option to place a border. We do not recommend placing it in this option because it is rectangular. If we want to give borders to the corners, we can place a Solid and then place a radius. In this case it would be 44px or 30px. So we see that it has some borders there. Generally, banners have pointed corners, so it is not always necessary to place these corners.
Content style has a bold font style and an inter font family. If we don’t like that font, we want to improve it, we can select here. For example, in the case of Adamina and we see how it changes. We can also customize the color and so on. The animation, if we see that it is too fast, we can lower it to 10% per second and there it is! The displacement looks much slower.
Finally, the CSS, which allows us to personalize this banner. We will notice a small watermark here. In the description, we will leave the CSS for you to remove it. What would this CSS be? It would be the following: class .bss-watermark {display: none !important;}. So with that, you would be removing the watermark.
If for any reason there is an update and this CSS name changes, then write to us so we can help you and provide you with the new CSS so you can remove the watermark. It is a mark that is here.
In addition to that, we also have the configuration to schedule the time this banner will appear. If we do not want it to be visible 24 hours a day, we do not have to modify anything here. If we want it to be visible for a range, maybe from 8 in the morning until 3 in the afternoon, we can filter these times. If not, we can leave it disabled.
We have the first option to place a delay before showing the banner, which we do not recommend because this app is already configured with a small delay before loading the page. That helps a lot in the optimization of our page. If we launch the banner first, it will cause some images, font loading, among others, to be delayed. So, it is very good that it has a small delay, which already comes with the app, we do not need to modify an additional delay.
For the second one, showing the banner again after closing, is not necessary. We might inconvenience the customer.
Finally, we will enter the Conditions. We want it to be shown on all pages of our e-commerce, only in the shop, on the contact page, among others. We also have clients here. If we want it to be shown to those clients who are logged in, remember that once they buy, they have access to the e-commerce with their account. So we only want this banner to be shown to those registered clients.
If we select the second option, it will only be shown to them. Among other conditions, specific clients, among other options. Also excluding some clients. If our promotional banner is about products for women, maybe we can exclude some male clients. It already depends on the strategy we are planning. This is part of the overall Shopify sliding banner strategy.
Final Results
Finally, the city. If we want to block this banner for some countries or by language, we can do it in this section. Finally, we have this translation option. This option allows us to include several languages for the banner according to the URL. Remember that when we create a new language, an English language, we create a subfolder in the URL, it is the domain subfolder and the language code.
For example, if it is English (/en/) and contacts continue. The domain /en/ shop and so on. So, for each of these, according to that address, it allows you to customize the language of the banner. Finally, when we have finished, it is initially deactivated, we click Activate and click Save.
Once there, here we will have all the banners that we are going to create. For example, for each campaign we have, we will be able to create different types of banners. Now, if we go here again, we can already see our banner.
Why do we say that we increase our sales with this banner? Because remember, we already have the option for the client to select here and be directed to an internal page of your domain. Now review all the products with the 30% discount. This is the power of a good Shopify sliding banner. Done, thanks friends at Marieú Technology Corporation!

THE AUTHOR
Daniel Alejandro Montoya Godenzi
Alejandro, holding a Master’s degree in Administration and Project Management and a Mechatronics Engineer, has experience in digital technology projects. He is part of the Marieú Technology Corporation team. In his free time, he enjoys creating new projects, reading a book, or watching a series.





