
Hello friends from Marieú Technology Corporation, is your audio not showing in adobe premiere? Here is the solution in 3 methods! Consequently, we will learn how to create a project, add workspaces, Generate Audio Waveform or display the audio track in Adobe Premiere, process, and make timeline display adjustments.
Adobe Premiere is a video editing program developed by Adobe Systems. Among its benefits, it has compatibility with other applications, allows you to apply effects to the audio, transitions, effects, and more. Adobe offers different plans, focused on business, personal, or academic use.
Why is the Audio Waveform Audio Not Showing in Adobe Premiere?
So here we have the Architecture Diagram of all the applications we are going to cover. On one side, we have Adobe Premiere, where we will create a project. Number one, we are going to import the recording and detect that the audio waveform is not showing.
In fact, in part number two, some recordings that we import will show the frequency or the audio waveform. For this particular case, we have selected one of the recordings that we use to show you within the Marieú Corp. channel. We selected one that does not display the audio waveform. Once the audio waveforms are not displayed, we are going to provide three solutions to address the audio not showing in adobe premiere issue.
The first solution would be to Generate Audio Waveform within “Clip.” We go to the “Clip” option, and inside, we select “Generate Audio Waveform.” That is the first solution. Number 2 would also be within “Clip.” We click “Clip,” select “Render and Replace.” This would be solution number 2, and solution number 3 would be within “Settings.” We select “Timeline Display Settings,” and a window opens where we will find an option that says “Show Audio Waveforms.”
With these three solutions, we are going to obtain the audio frequency in Adobe Premiere. Before showing these three solutions, remember that we must also update the Adobe Premiere application within Creative Cloud.
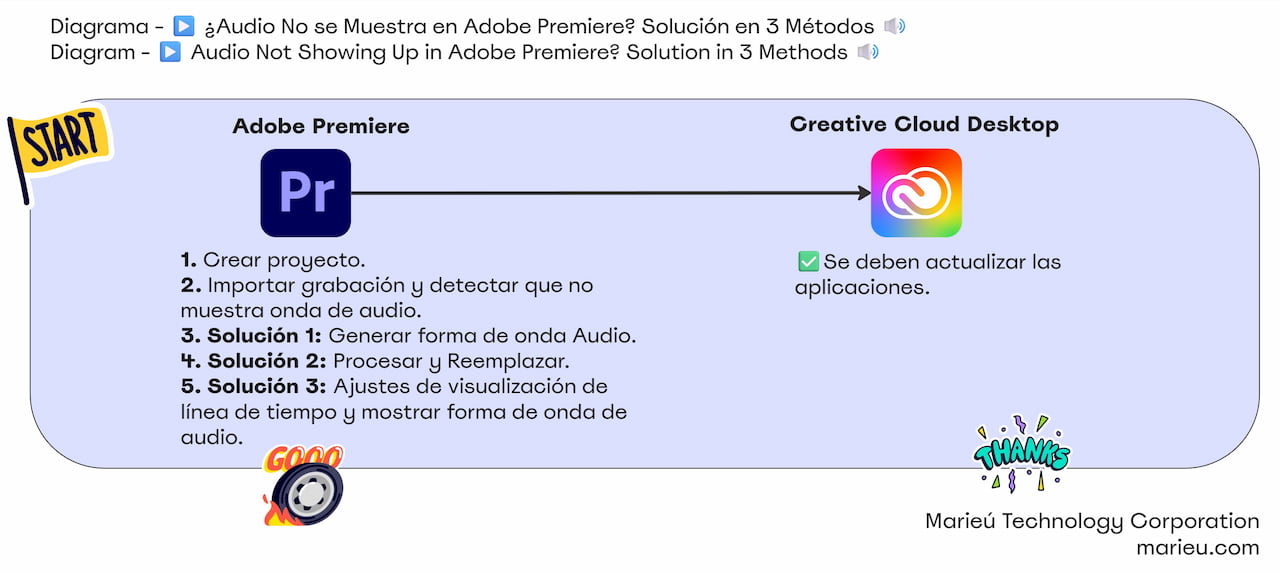
Diagram: Strategy to Fix Audio Not Showing In Adobe Premiere.
Source: Author’s Own Work, via Miro software.
So, here we are inside the Creative Cloud Desktop, and we go to the Applications section. Within Applications, we have all the applications that we have already installed on our PC, and in some cases, they need to be updated. If we look at Premiere, we see that it is already updated; an update is not necessary before landing on the three solutions for the audio waveform frequency.
In case we have an update, for example, in Photoshop, it shows “Update Available.” And here we can click “Update All” or, independently, update the application that we are going to use.
Now we have Premiere open, the Premiere application is open, and we are going to create a new project. We click “New Project.” By default, it shows you a history of all the projects you have been developing. We are going to name the project: “Premiere Audio Waveform Solution” and click “Create Project.” We already have a previously created “workspace.” For example, we have the timeline here, at the bottom. For the top part here, we have the entire project imports folder.
If we are going to include a video, we can import it or drag it into this section. We have the effects control and the mixer for this part, and the video preview is here. In the right part, or the upper right part, we have the Essential Graphics and the “Lumetri Color.” So, this “workspace” is customized for each of you.
If you want to change this “workspace” with different sections, we can go here to “Workspace,” and we have different types of workspaces. There are some for editing, colors, effects, audio; depending on that, all these sections will be modified. From 50% onwards, all these sections will change. We have a saved workspace already. You can also create your workspace and save it; we have saved it there.
So, now we are going to import the video where we do not see the audio waveform, confirming that the audio not showing in adobe premiere error exists. So, we are in the Marieú folder, video number 12, and we are going to import it. We select the video, drag, and drop. We select the video and place it in the timeline. We have the video within the timeline; however, we cannot visualize the frequency. Moreover, if we increase the track a little more, we see that the frequency in Adobe Premiere is not displayed.
We are going to go with the first method to solve this error. We go to the “Clip” tab. Within “Clip,” we select Generate Audio Waveform—there it is! In our case, method 1 did not work. So, now we go with method number 2. We go to the “Clip” tab, click “Render and Replace,” and a small “Render and Replace” window opens. We click “Accept” and wait for it to finish rendering and replacing. Once finished, we see that the frequency or the audio waveform in Premiere is already generated—there it is!
In this particular case, method 2 worked for us. We are also going to show you how you can apply method number 3 to address audio not showing in adobe premiere. We go to “Settings.” Within “Settings,” we are going to look for the option to “Show Audio Waveforms.” In this case, it is activated. If we deactivate it, we will not be able to visualize it. We are going to activate it, “Show Audio Waveforms,” and there it is! That is method number 3.

Audio Waveform Displayed, Fixing "Audio Not Showing In Adobe Premiere."
Source: Author’s Own Work, via Adobe Premiere.
Final Results
To finish, remember that this frequency helps us a lot to make cuts in the pause parts, in the silences, or if we want to change some other scene, through this visualization of the waveform in Adobe Premiere.
So, it becomes much easier for us to cut the parts of the frequency that are in silent mode. For example, here we select and cut. We eliminate a ripple, and there it is! Now that we successfully managed to Generate Audio Waveform, the editing process is easier. Done, thank you, friends from Marieú Technology Corporation!

THE AUTHOR
Daniel Alejandro Montoya Godenzi
Alejandro, holding a Master’s degree in Administration and Project Management and a Mechatronics Engineer, has experience in digital technology projects. He is part of the Marieú Technology Corporation team. In his free time, he enjoys creating new projects, reading a book, or watching a series.





