
Hello friends from Marieú Technology Corporation, let’s talk about adobe premiere comic titles! Indeed, in this step-by-step guide, you will learn to create a project, import a MOGRT Template, install fonts, edit the animated title, and export in adobe premiere comic titles. 💬🎁
Adobe Premiere is a video editing software developed by Adobe Systems. Among some of its benefits is compatibility with other applications; it allows you to apply audio effects, transitions, effects, and more. The Adobe company offers different plans, focused on businesses, personal use, or academic use.
How to Create Adobe Premiere Comic Titles?
We use Envato Elements to obtain the MOGRT Template, and Premiere to create the project. We are going to edit the presentation; maybe we want it to have a title of a particular color, and finally, we will export it. Within Creative Cloud Desktop, we have to add some fonts that come with this MOGRT Template. We are provided with some links to download them. Finally, we must update the Adobe Premiere application to avoid any errors we may have within the application.
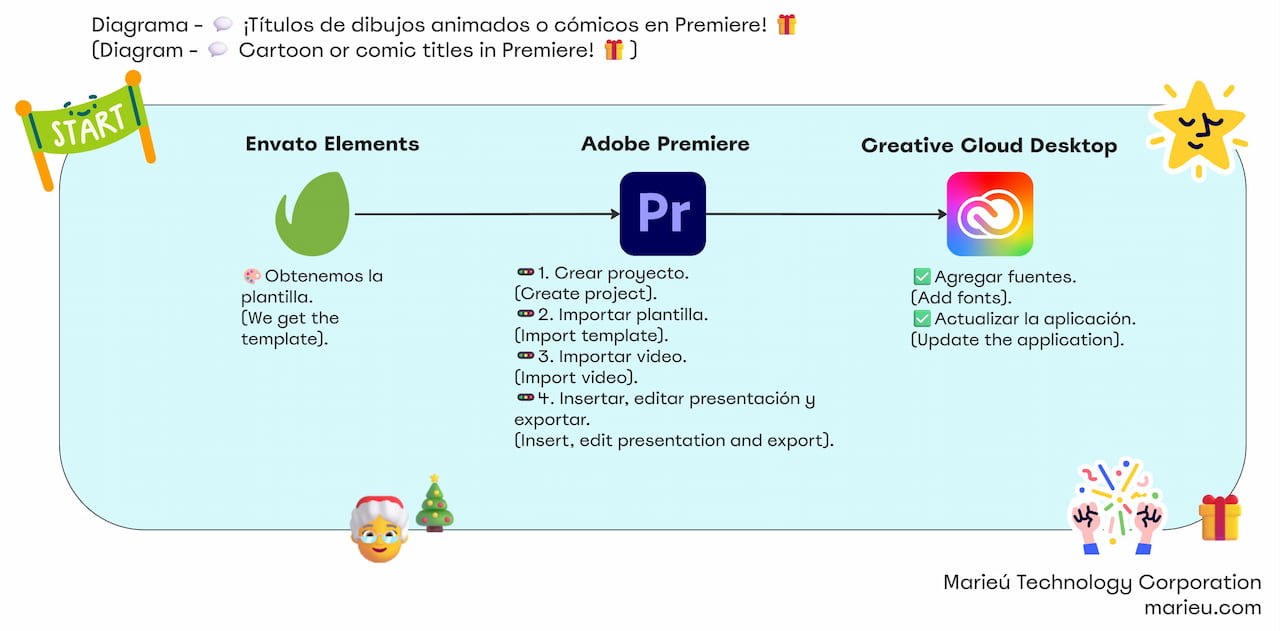
Diagram: Adobe Premiere Comic Titles Guide!
Source: Author’s Own Work.
We are inside Envato Elements, and here we have the animated adobe premiere comic titles. We download the required MOGRT Template files, and internally, we will receive a “help” folder; there is a notepad where all the font links are provided. Additionally, we receive 10 comic titles.
We are now inside Premiere. We are going to create a new project. We enter the project name, “Marieú Animated Titles.” We change the project location, deploy the tab. We choose the location, select the folder, and click “Create Project.”
So, once we have created the project, we will import the MOGRT Template we downloaded from Envato Elements. We are going to Essential Graphics and manage the additional folders. With this window open, we will add the template. Remember we have it inside a folder with .MOGRT files. We select, click OK, Local, deploy the “Comics Bubbles” tab. Remember that this was the name of the folder, and all the .MOGRT files open up; each of them is a part of the MOGRT Template.
Now, if we look here, in the upper right corner, we see a font alert, which means the original fonts for this template are not synchronizing. We click “Synchronize Fonts.” It is not recognizing two fonts, so we have to install the fonts. For that, we go here. There we have all the fonts for all the .MOGRT files, and it directs us to the Google Fonts page; we download the font family. Once you have downloaded the three fonts, internally, we have the .TTF files, or in some cases, the .OTF files; both are font files.
How do we install them within Adobe Creative Cloud? We do the following. We go here to Fonts, we go to Uploaded Fonts, and click “Add More.” We add the first font, we go with the second font, “Luckiest,” and finally, “SeymourOne.” We activate the verification checklist and click “Add.” It appears as installed. We are going to validate it inside Premiere. We click OK, and we see that the font missing alert no longer appears.
Now we are going to import the video, to be able to apply these animated adobe premiere comic titles. For that, we are going to the Project panel, select the Project panel, and import a project we already have, “Ricuritas de Marieú.” We click OK, we open the sequence—there it is; we are going to process it.
We are going to add animated title number four. We select, drag, and drop. We position the animated title within the video. We want it to start exactly here and finish after about 4 seconds. We cut the video and eliminate the remaining part. Furthermore, we are going to apply a film dissolve when they enter. For that, we go here, select the title, and we are going to reduce the scale to 70. We select Position, and we are going to move it to the upper part.
We are going to change the text to an exclamation mark. We have to reduce the size a bit; for that, we go here, set the height to about 450. Now that we have changed the text, we are going to change the color. Within the Effects panel, we look for HLS, Lumetri Secondary Colors. We select the effect and drop it onto the animated title. We go to the color balance part, and we are going to vary the hue. We will leave it in blue and green. We finalize the cutting for the MOGRT Template application.
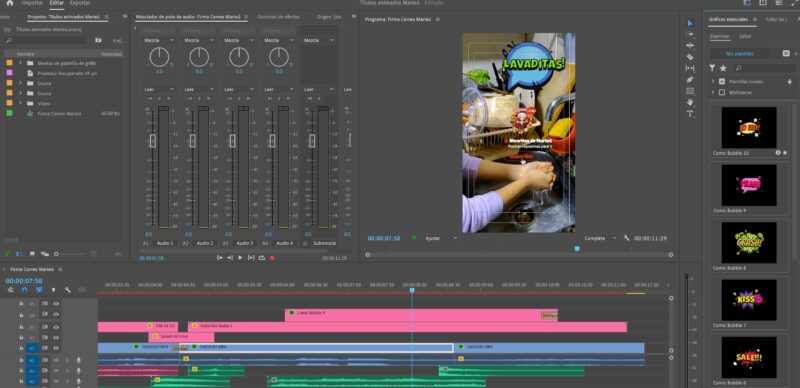
Editing Adobe Premiere Comic Titles.
Source: Author’s Own Work.
Final Results
Now, we are going to export the project. We select the video location, “Ricuritas de Marieú Short 1.” For the preset settings, we will use YouTube 1080p Full HD, and in video, to create a short, we are going to invert the frame sizes. We select Custom, once there, we invert, set it to 1080 by 1920, and click Export. The result is the following: “Little friends, let’s go wash our hands, come with me, very clean.” That’s it, thank you, friends from Marieú Technology Corporation!

THE AUTHOR
Daniel Alejandro Montoya Godenzi
Alejandro, holding a Master’s degree in Administration and Project Management and a Mechatronics Engineer, has experience in digital technology projects. He is part of the Marieú Technology Corporation team. In his free time, he enjoys creating new projects, reading a book, or watching a series.





